

How To Repair Chipped Baseboards
Repairing baseboards isn't difficult but those cruddy cracks and fries tin build up over time as a house settles. Today, I want to show you how to repair your baseboards similar a pro!

If there is one fact I know about older homes, information technology's that the poor baseboards and trim take far more of a beating than they should. All those pretty wall pictures on Pinterest with the stunning crown molding and well-baked baseboards? I have yet to movement into a house like that.
Only gaps and cracks in baseboards and trim aren't only unsightly, they tin create inefficiencies in heating and air as well as pathways for pests.
From repairing window sills to building a custom closets or calculation picture frame wainscoting, beautiful trim and baseboards actually can make a wall stunning. It'southward those piffling details that make a difference.
Now, nosotros tin fix it!
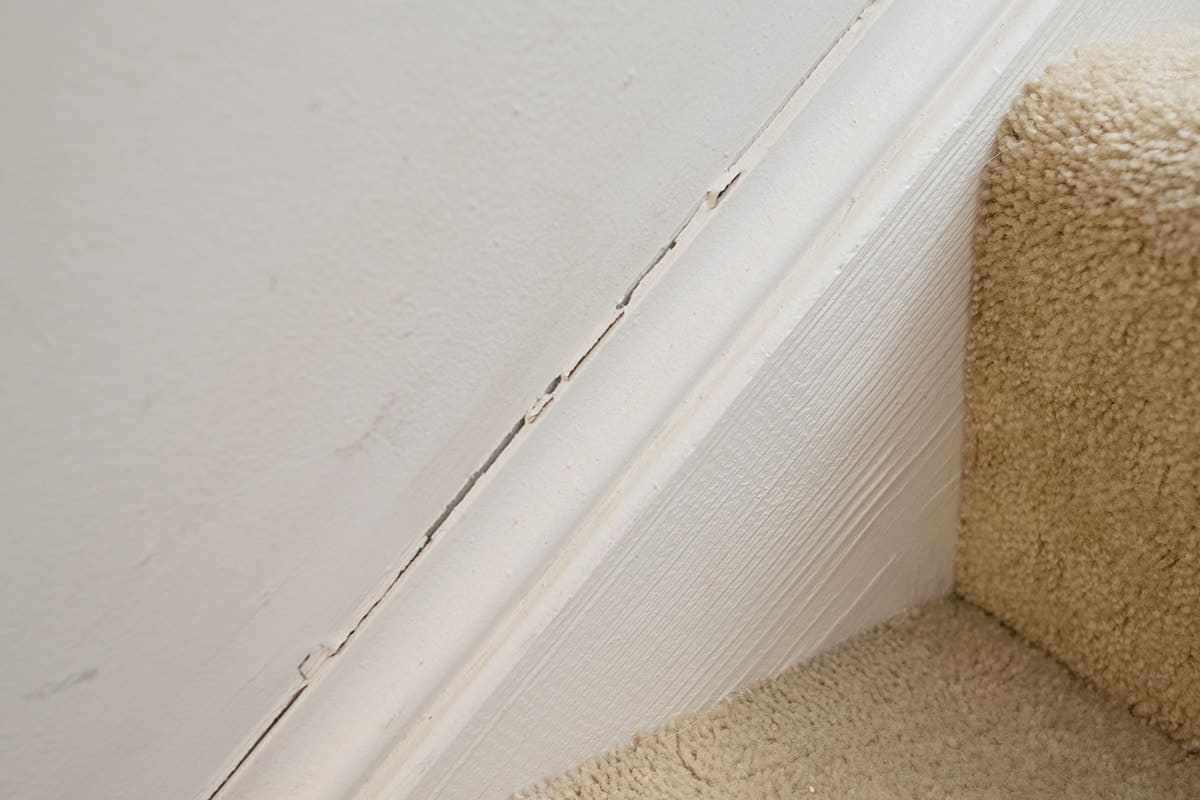
Both sets of stairs were desperately croaky, but the baseboards themselves seemed to exist in decent condition. Replacing them seemed like an extra step we didn't need.
Pro Tip: Buy a Better Caulk Gun
It's only a few dollars for a slightly nicer caulk gun and the benefits are and then, so worth information technology. This is one of the caulk guns that I utilize and dear because:
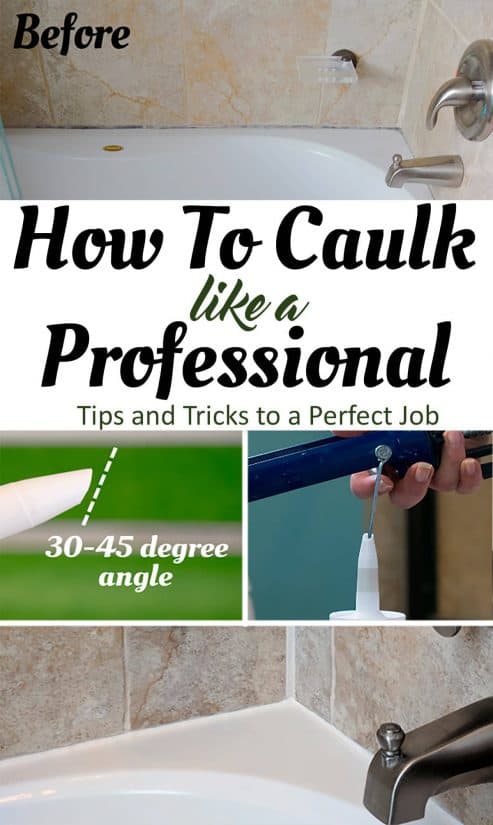
- With cheap caulk guns, the caulk frequently drips long after you take released the trigger, wasting caulk and a bunch of newspaper towels every time you prepare it down. I simply use dripless caulk guns! No wasted caulk.
- It comes with a handy pin attached that easily pierces the foil barrier inside the tube.
- The trigger leap allows for more fifty-fifty caulk distribution.
*If you use viscous materials (such as sanded caulk or adhesives), have a BIG job, have poor hand strength,/arthritis, or would just like something that doesn't require you to clasp as much, get a high thrust caulk gun. This is the one that I use too for bigger jobs.
How To Repair and Caulk Baseboards Step-by-Footstep

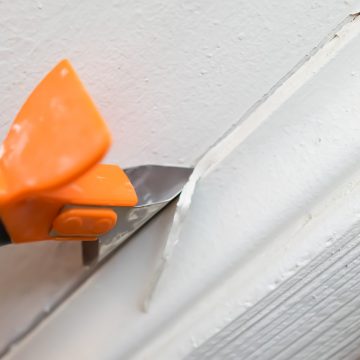
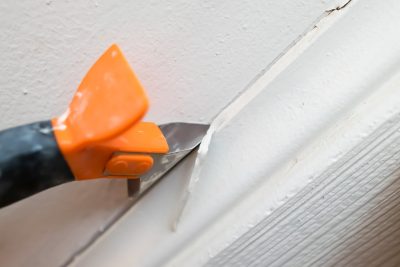
Step 1 – Begin by scraping off the one-time caulk. If the caulk is nonetheless attached in places, cut it with a razor knife to loosen from the wall. I beloved this caulk scraper because it won't gouge the wall or tile. Scrape or sand any backlog texture off to create a smoothen surface.
Footstep 2- (Optional) Record off the wall. I similar to tape the forepart of the baseboard over the edge. It makes information technology easier to wipe off. If I want a really crisp line, I will tape the wall as well. This helps give me a guide for painting later.
Brand sure to burnish the edges. This means running your finger along the edges just earlier yous caulk to make sure that caulk won't button under information technology.
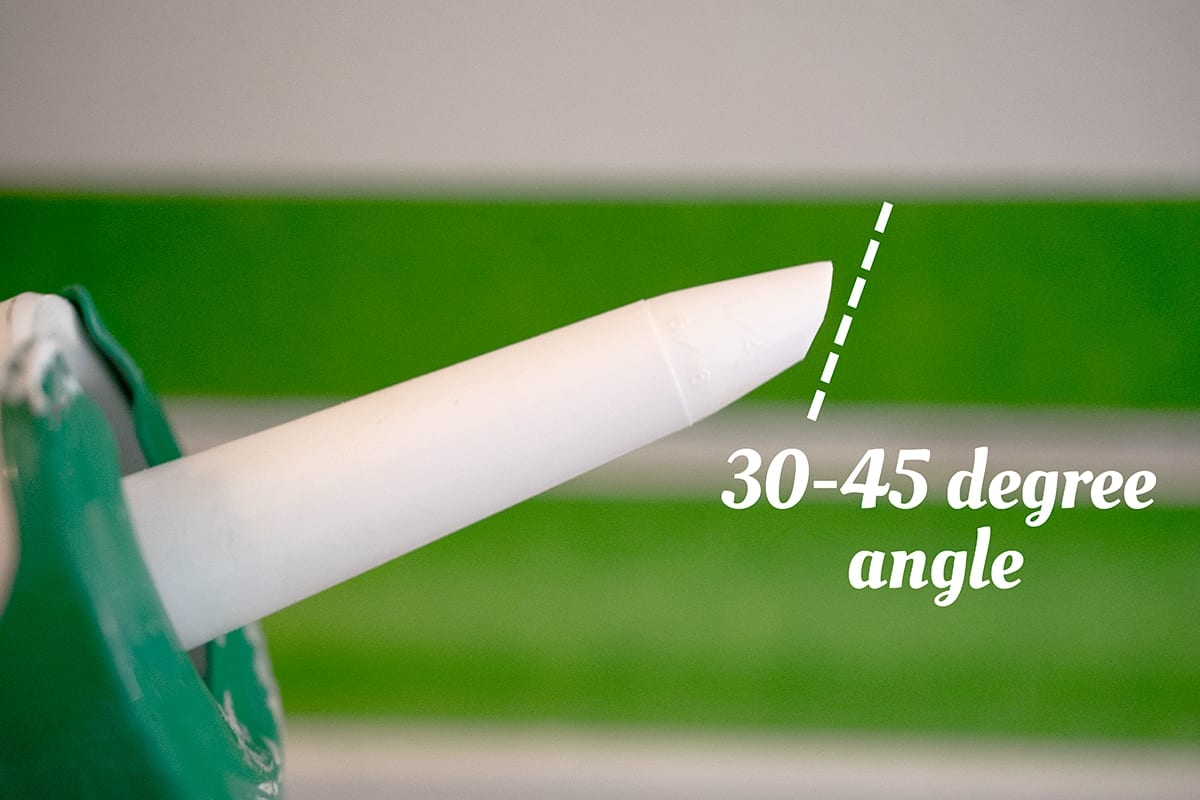
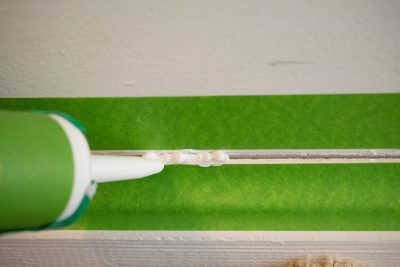
Step three- Prepare the caulk. One trick to caulking is to cut the tip of the caulking gun at an angle. I use bone cutting scissors that have a notch out of them to cutting the tube. Some guns come up with a handy hole that cuts the tip.
Pace iv – Lay the Caulk. Equally you are caulking, concord the gun so that the tip is completely affluent with the baseboard. I usually caulk an entire side end to finish.

Since I do a lot of caulking, getting a nicer gun with comfort grips that won't drip subsequently I set it down is really worth information technology.
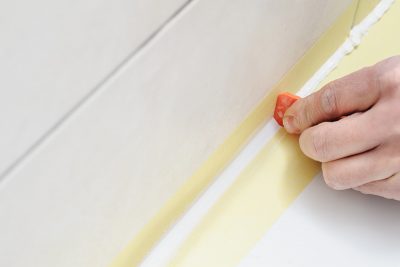
Step 5 – Smooth out the Caulk.
My personal favorite tool is my finger tip to smooth out the caulk. Put on some latex gloves and make sure they are tight fitting effectually your finger (no ridges or ripples). Use your index finger at an angle with low-cal, but consistent pressure.
However, I generally recommend this wedge tool if y'all do not feel confident with just your easily.
I make about two passes – I wipe the well-nigh of backlog off of several feet to make sure I covered well. The second laissez passer is finish to end with a little more pressure to make certain the final wait is good.
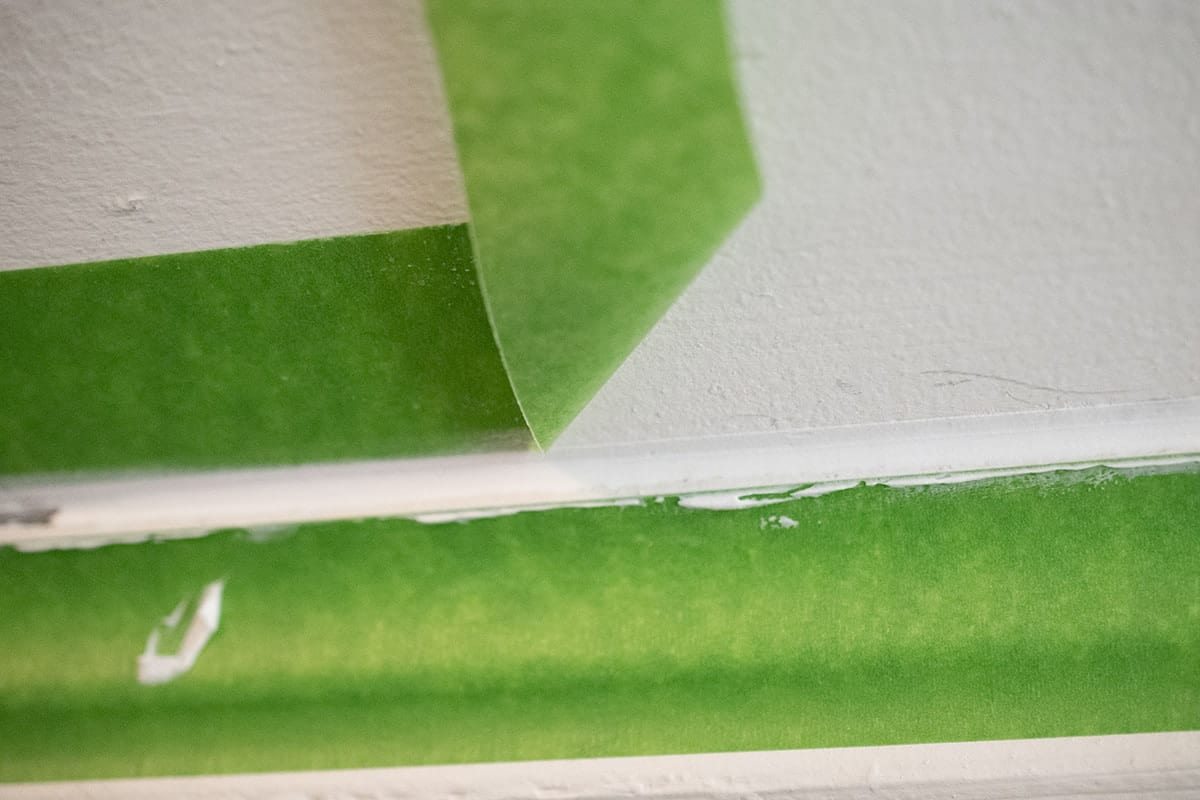
Step 6 – Pull the tape. Before pulling the tape, make sure you lot tin can encounter the edges of the record well. Otherwise, the tape volition not have a squeamish edge.
Oh, I dear a practiced reveal! Don't you?

This is the mirroring staircase and it was in exactly the aforementioned condition before we repaired it. See what I mean? Those clean lines actually wait professional!
Who knew baseboards could be this heady?!
FAQs about Caulking Trim
Should you lot pigment baseboards or walls beginning?
I always paint my baseboards first considering they are lighter in color. If you were using a darker color on the baseboards than on the wall, you may consider painting the wall first.
How exercise you caulk big gaps in trim and baseboards?
Cracks larger than ¼ of an inch may take more passes. The process is essentially the aforementioned as smaller gaps. However, make sure you fill up deeper in the gap (not flush with the surface). Allow the deeper caulk to dry completely before caulking a surface bead.
What is the all-time caulk for trim and baseboards?
In that location are many proficient brands for trim caulk. Pay attention to whether the caulk you are using is intended for interior or exterior as well equally whether it is paintable. Crack and compress resistant caulk is a very good thought.
What is the all-time way to caulk perfectly?
My personal favorite tool is my finger tip to smooth out the caulk. It is soft enough to get over ridges and go on a consequent pressure level. Put on some latex gloves and make sure they are tight fitting around your finger (no ridges or ripples). Employ your alphabetize finger at an angle with lite, but consistent pressure.
However, I more often than not recommend this wedge tool if you lot practice non experience confident with just your hands.
Looking for More than Simple Ways to Improve Your Abode?
- Repair and Replace Cleaved Window Sills
- Brand Basic Cabinets Look Expensive with Trim
- Edifice A Custom Closet
- How to Paint Old Kitchen Cabinets
- Kitchen Backsplash with Skin and Stick Drinking glass Tile

Sign up below to receive updates including costless printables, arrangement tips, home comeback projects, recipes and more!
More than DIY Habitation Projects:
-
New Vanity under $500 -
How To Caulk A Bathtub -
Save Time Paint Cabinets -

Replacing Window Trim
PS I love seeing your creations! Be certain to take a photo and tag#cravingcreative on Instagram! Y'all tin can alsostay in touch with me through following me on Instagram, Pinterest, and Subscribing to the Newsletter!
-
Utility Knife
- Silicone Caulk Brand sure information technology is paintable caulk fabricated for trim
- Sandpaper or Sanding Blocks
- Painter's Tape
- Well fitting Latex or Nitrile Gloves I get these from Harbor Freight
- Paper Towels
- Wedge Tool Optional
- Paint Supplies
-
Remove the old caulk. I love this a caulk scraper because information technology won't gouge the wall or tile. Scrape or sand any backlog texture off to create a smooth surface.
-
(Optional) Tape off the wall. I similar to tape the front of the baseboard to the border It makes it easier to wipe off. If I want a actually well-baked line, I volition record the wall likewise. This helps give me a guide for painting later.
-
Prepare the caulk and gun. Cutting the tip of the caulking gun at an bending. Pierce the inside seal with a skewer or some caulk guns come with a piercer tool.

-
Agree the gun so that the tip is completely affluent with the baseboard. Caulk an entire side stop to end. Make sure to fill all gaps.
-
Smooth out the Caulk. With a bit of practise, smoothing caulk with your index finger is a breeze. Put on some latex gloves and brand certain they are tight fitting around your finger (no ridges or ripples). Use your index finger at an angle with low-cal, just consequent pressure. If you lot aren't confident using your hands, a wedge tool helps. Make ii passes – Wipe virtually of excess off of several feet to brand certain it is covered well. The 2d pass is terminate to end with a little more pressure to brand certain the concluding look is smooth. Use paper towels to wipe the glove between passes.
-
Pull the record. Earlier pulling the record, make certain y'all tin see the edges of the tape well. Otherwise, the record will non have a prissy border.

Best Types of Caulk for Trim and Baseboards:
There are many skillful brands for trim caulk. Pay attention to whether the caulk yous are using is intended for interior or outside as well as whether it is paintable. Crack and shrink resistant caulk is a very good thought.
If your gap is larger than ¼ inch:
Cracks larger than ¼ of an inch may take more passes. The process is essentially the same as smaller gaps. Notwithstanding, make sure y'all fill up deeper in the gap (not flush with the surface). Allow the deeper caulk to dry out completely before caulking a surface bead.
Source: https://www.cravingsomecreativity.com/repairing-replacing-baseboards-like-pro/
0 Response to "How To Repair Chipped Baseboards"
Post a Comment