

How To Repair Craftman Engage And Disengage Cluch
The purpose of a clutch in a auto is to transmit the torque, deliver the power from the engine to the transmission, reduce drive vibration, and to protect the drivetrain. The clutch is located between the engine and the manual of a vehicle.
When a motorcar is moving nether power, the clutch is engaged. A force per unit area plate bolted to the flywheel exerts abiding strength, by ways of a diaphragm bound, on the driven plate. When the clutch is disengaged (pedal depressed), an arm pushes a release bearing against the center of the diaphragm spring which releases the clamping pressure.
When the clutch is not fully disengaging, the clutch is constantly slipping and called-for up the friction materials. Plus, the clutch release bearing will constantly have pressure on it along with rotational twists causing excessive heat build up. Somewhen the friction cloth will burn off and the clutch release bearing will seize and collapse.
There are four areas to check for a clutch that'due south not fully disengaging
- Stretched or broken clutch cable
- A hydraulic leak within the clutch hydraulic system
- Linkage is out of aligning
- Aftermarket parts that are incompatible
Function 1 of v: Diagnosing a stretched or broken clutch cablevision
Preparing the vehicle to check the clutch cablevision
Materials Needed
- Creeper
- Flashlight
- Jack
- Jack stands
- SAE/metric socket ready
- SAE/metric wrench fix
- Safety glasses
- Wheel chocks
Footstep ane: Park your vehicle on a apartment, hard surface. Brand sure that the transmission is in park (for automatics) or in 1st gear (for manuals).
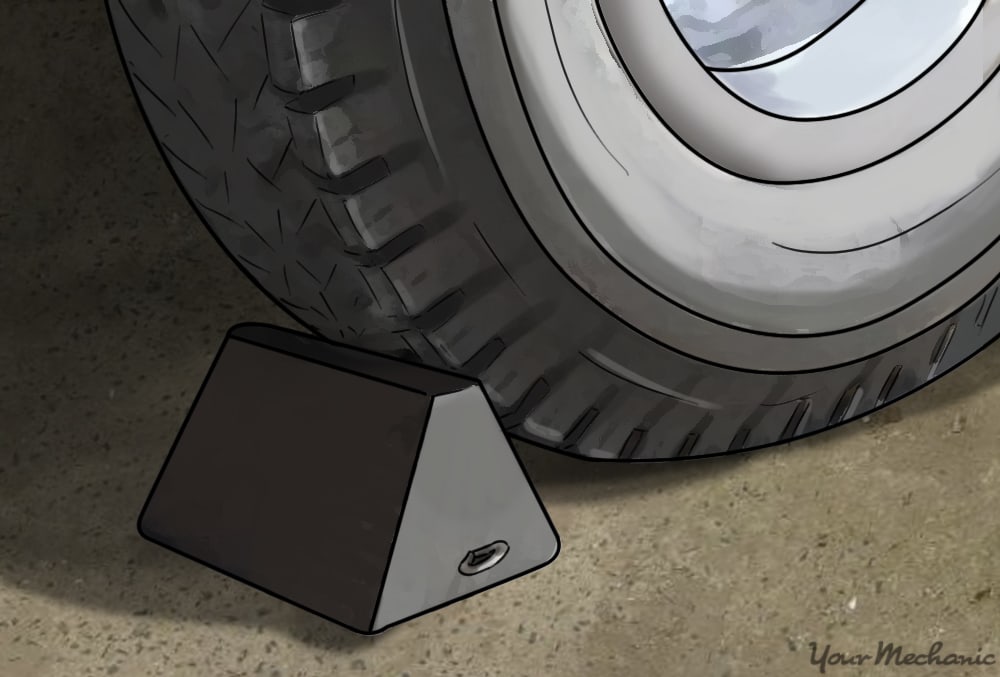
Step two: Place wheel chocks around the rear tires that will be remaining on the ground. Engage the parking brake to the lock the rear tires from moving.
Step 3: Heighten the vehicle. Using a floor jack that is recommended for the weight of the vehicle, lift under the vehicle at its specified jacking points until the wheels are completely off the ground.
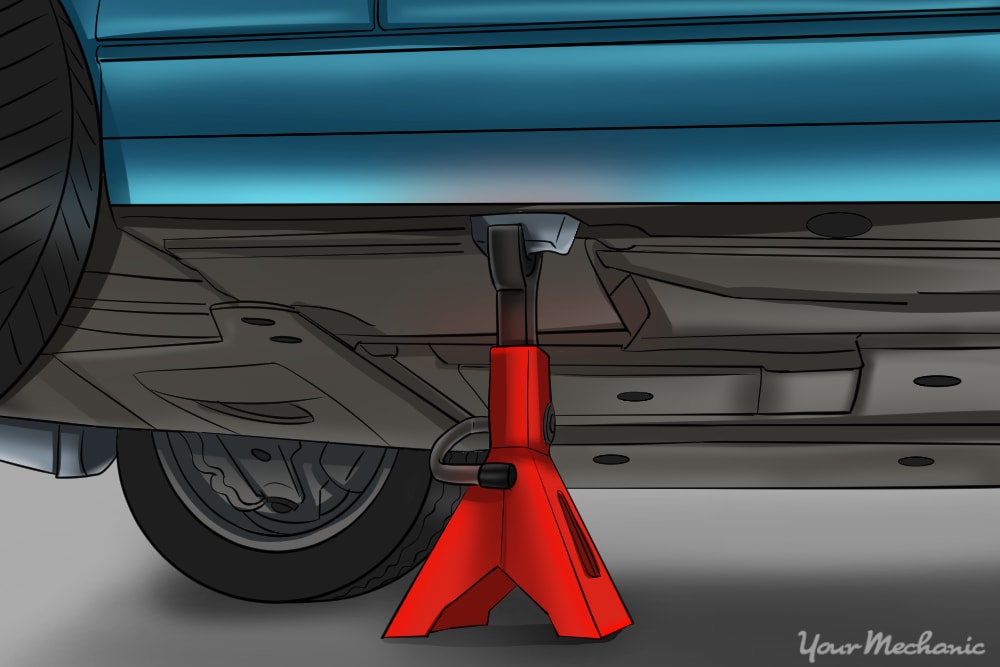
Footstep 4: Identify the jack stands. The jack stands should go under the jacking point locations. And so lower the vehicle onto the jack stands. For most mod cars, the jacking points for jack stands volition be on the compression weld merely nether the doors along the lesser of the car.
Checking the condition of the clutch cable
Step ane: Put on your safety spectacles, take hold of your flashlight, and grab your creeper. Become under the vehicle and check the status of the clutch cable. Wait for any looseness to the cablevision and if the cable is cleaved or stretched.
Step 2: Check the cablevision support brackets for any looseness. Brand sure that the cable is secure and that the cablevision housing does non move.
Stride three: Expect at the cablevision where information technology is attached to the clutch pedal. Make sure that information technology is not frayed or stretched.
Lowering the vehicle subsequently performing the diagnosis
Step 1: Collect all tools and your creeper and place them out of the fashion.
Step 2: Enhance the vehicle. Using a floor jack that is recommended for the weight of the vehicle, elevator under the vehicle at its specified jacking points until the wheels are completely off the footing.
Step 3: Remove the jack stands and keep them far away from the vehicle.
Pace 4: Lower the vehicle to where all four wheels are on the ground. Pull out the jack and put it bated.
Step five: Remove the bike chocks from the rear wheels and put the aside.
If the problem needs attention at present, repair the stretched or broken clutch cablevision.
Office two of v: Diagnosing a hydraulic leak within the clutch hydraulic system
Preparing the vehicle to check the clutch hydraulic system for leaks
Materials Needed
- Creeper
- Flashlight
- Jack
- Jack stands
- Rubber glasses
- Wheel chocks
Footstep 1: Park your vehicle on a flat, difficult surface. Brand sure that the transmission is in park (for automatics) or in first gear (for manuals).
Stride 2: Place bike chocks around the rear tires that will be remaining on the ground. Engage the parking brake to the lock the rear tires from moving.
Pace 3: Heighten the vehicle. Using a floor jack that is recommended for the weight of the vehicle, lift nether the vehicle at its specified jacking points until the wheels are completely off the ground.
Stride 4: Place the jack stands. The jack stands should get under the jacking signal locations.
So lower the vehicle onto the jack stands. For well-nigh modern cars, the jacking points for jack stands will be on the pinch weld only under the doors along the lesser of the car.
Checking the condition of the clutch hydraulic organization
Pace 1: Put on your safety glasses and grab your flashlight. Open up the hood to the engine compartment and locate the clutch master cylinder.
Cheque the condition of the clutch master cylinder and meet if there is whatever leaking fluid. Look at the back of the clutch master cylinder for any oil present.
Likewise, look at the hydraulic line and cheque for any leaking oil. Bank check the line to and make sure that information technology is tight.
Step 2: Grab your creeper and go under the vehicle. Cheque the slave cylinder condition for any leaks. Pull dorsum on the safety boots to come across if the seal on the housing has failed.
Make sure that the bleeder screw is tight. Check the line and brand sure that it is tight.
Lowering the vehicle after performing the diagnosis
Pace 1: Collect all tools and your creeper and place them out of the mode.
Stride 2: Enhance the vehicle. Using a floor jack that is recommended for the weight of the vehicle, lift nether the vehicle at its specified jacking points until the wheels are completely off the ground.
Step iii: Remove the jack stands and keep them far away from the vehicle.
Step four: Lower the vehicle to where all 4 wheels are on the ground. Pull out the jack and put it aside.
Stride 5: Remove the wheel chocks from the rear wheels and put the bated.
Accept a certified mechanic bank check to see if there's a hydraulic leak inside the clutch hydraulic system.
Office three of 5: Diagnosing a linkage that is out of adjustment
Preparing the vehicle to cheque the adjustment settings on the clutch linkage
Materials Needed
- Creeper
- Flashlight
- Jack
- Jack stands
- Needle nose pliers
- SAE/metric wrench set up
- Safety glasses
- Bicycle chocks
Stride 1: Park your vehicle on a flat, difficult surface. Make sure that the manual is in park (for automatics) or in start gear (for manuals).
Step two: Identify wheel chocks effectually the rear tires that will be remaining on the basis. Appoint the parking brake to the lock the rear tires from moving.
Pace three: Raise the vehicle. Using a floor jack that is recommended for the weight of the vehicle, elevator under the vehicle at its specified jacking points until the wheels are completely off the basis.
Footstep four: Place the jack stands. The jack stands should become nether the jacking point locations. So lower the vehicle onto the jack stands.
For almost modern cars, the jacking points for jack stands will be on the pinch weld just under the doors along the lesser of the machine.
Checking the aligning settings on the clutch linkage
Step one: Put on your safety glasses, catch your flashlight, and catch your creeper. Go nether the vehicle and check the condition of the clutch linkage.
Look to run into if the clutch linkage is loose or out of aligning. Check the connections to the clutch fork to make sure that the clutch linkage is tight.
Pace 2: Check the clutch linkage at the clutch pedal. Make sure that the pin and cotter pin are in place.
Check to come across if the adjusting nut is tight.
Pace 3: Check the return leap on the clutch pedal. Ensure that the render spring is functional and working properly.
Lowering the vehicle afterwards performing the diagnosis
Pace one: Collect all tools and your creeper and place them out of the way.
Pace 2: Raise the vehicle. Using a floor jack that is recommended for the weight of the vehicle, elevator nether the vehicle at its specified jacking points until the wheels are completely off the ground.
Step three: Remove the jack stands and keep them far away from the vehicle.
Step 4: Lower the vehicle to where all iv wheels are on the footing. Pull out the jack and put it aside.
Stride 5: Remove the wheel chocks from the rear wheels and put the aside.
If the linkage is out of adjustment, have information technology looked at past a professional technician.
Office 4 of 5: Diagnosing aftermarket parts that were installed and are incompatible
- Note: Some aftermarket parts are similar to the manufacture, however, there may be a different line up with the bolt patterns or the parts may operate differently. If your aftermarket parts are incompatible it tin can touch the operation of your clutch.
Preparing the vehicle to bank check the incompatible aftermarket parts
Materials Needed
- Creeper
- Flashlight
- Jack
- Jack stands
- Needle nose pliers
- SAE/metric wrench set
- Condom glasses
- Wheel chocks
Footstep 1: Park your vehicle on a apartment, hard surface. Brand sure that the transmission is in park (for automatics) or in first gear (for manuals).
Step 2: Place bike chocks effectually the rear tires that will be remaining on the ground. Engage the parking brake to the lock the rear tires from moving.
Pace 3: Enhance the vehicle. Using a floor jack that is recommended for the weight of the vehicle, lift under the vehicle at its specified jacking points until the wheels are completely off the basis.
Stride 4: Identify the jack stands. The jack stands should go under the jacking betoken locations. So lower the vehicle onto the jack stands.
For most modern cars, the jacking points for jack stands will be on the pinch weld simply under the doors along the bottom of the machine.
Checking the aftermarket parts that are incompatible
Step 1: Look over the entire clutch system. Locate any unusual parts that don't look like factory installed. Observe the location and nature of the part.
Step two: Check the parts for any damage or unusual habiliment. Operate the clutch with the engine off and see if the function or parts are not working correctly.
- Note: If the clutch pedal was replaced with an aftermarket pedal, you will need to cheque the clutch pedal to floor distance.
Information technology is common for someone to have a custom clutch pedal installed and not have the proper clearance making a symptom of non fully disengaging clutch for the pedal striking the flooring board.
Lowering the vehicle after performing the diagnosis
Step one: Collect all tools and your creeper and place them out of the fashion.
Step two: Enhance the vehicle. Using a floor jack that is recommended for the weight of the vehicle, elevator under the vehicle at its specified jacking points until the wheels are completely off the ground.
Step iii: Remove the jack stands and keep them far abroad from the vehicle.
Step 4: Lower the vehicle to where all iv wheels are on the ground. Pull out the jack and put it aside.
Stride five: Remove the wheel chocks from the rear wheels and put the aside.
If yous need additional assist in diagnosing the issue, and so yous should seek out help from a certified mechanic. Fixing a clutch that is not fully disengaging tin can help improve the drivability of the vehicle and prevent any damage to the clutch or manual.
The statements expressed higher up are only for informational purposes and should exist independently verified. Please see our terms of service for more details

How To Repair Craftman Engage And Disengage Cluch,
Source: https://www.yourmechanic.com/article/how-to-troubleshoot-a-clutch-that-won-t-fully-disengage-by-marvin-sunderland
Posted by: monroewhia2001.blogspot.com
0 Response to "How To Repair Craftman Engage And Disengage Cluch"
Post a Comment